Round Sourdough Sandwich Bread
My Children’s Favorite Sourdough Sandwich Bread is a beginner tried and true delicious recipe dating back 20 years when my children were growing up. This bread is a fermented sourdough bread that you will feel good about feeding to your family. The easiest bread recipe you will ever find with consistent results.
Busy families need easy but “made from scratch” healthy food available for a quick meal or on-the-go. Children’s Favorite Sourdough Sandwich Bread is your go-to bread recipe when you need fast food made at home. As homemaker’s we all need recipes that don’t require much thought and fit easily into our schedule. No special equipment or complicated processes to bake this bread. Perfect for beginner sourdough bread bakers. This was my first bread when I started on my bread baking journey.
Tools You May Need to Make “Your Children’s Favorite Sourdough Sandwich Bread”
- Bowl
- Spoon or Danish dough whisk
- Cookie Sheet
- Unbleached Parchment Paper (optional)
- A lame or razor blade to score dough (optional) if not use a serrated knife
- Bench Scraper-Helpful but optional
This recipe does not require any special equipment which makes it a perfect beginner sourdough bread.
Ingredients
- 4 cups Unbleached All-Purpose Flour – organic is best
- 1 3/4 teaspoons Salt-I use Redmond or sea salt
- 1 tablespoon Honey or Sugar
- 1 1/2 cups Room Temperature Filtered Water-no chlorine
- 1/2 cup Bubbly Active Sourdough Starter
- Olive Oil
We have Youtube videos and blog posts to help you develop your sourdough skills.
Step-by-Step Instructions to make Your Children’s Favorite Sandwich Bread
- Feed your sourdough starter 4-12 hours before you are ready to make your dough. You will need 1/2 cup of active starter for your recipe. To feed your starter: discard all but 1 to 4 tablespoons of starter in your jar, then add 1/4 cup of water and a scant 1/2 cup of flour. Mix, cover, and set aside until doubled with bubbles on the side of the jar and a bubbly dome on top. Do a float test by putting a teaspoon of starter in a cup of water. If it floats then it is active enough to make bread. The warmer the ambient temperature the faster the rate of fermentation-the colder the ambient temperature the longer it will take for your starter to be active.
- In a bowl add 1 1/2 cups of water, then 1/2 cup of sourdough starter. The starter should float in the water and this is a good test to make sure your starter is active. Mix well until the mixture looks milky.
- Add 1 3/4 teaspoons salt, and 1 tablespoon honey/sugar to the bowl and mix.
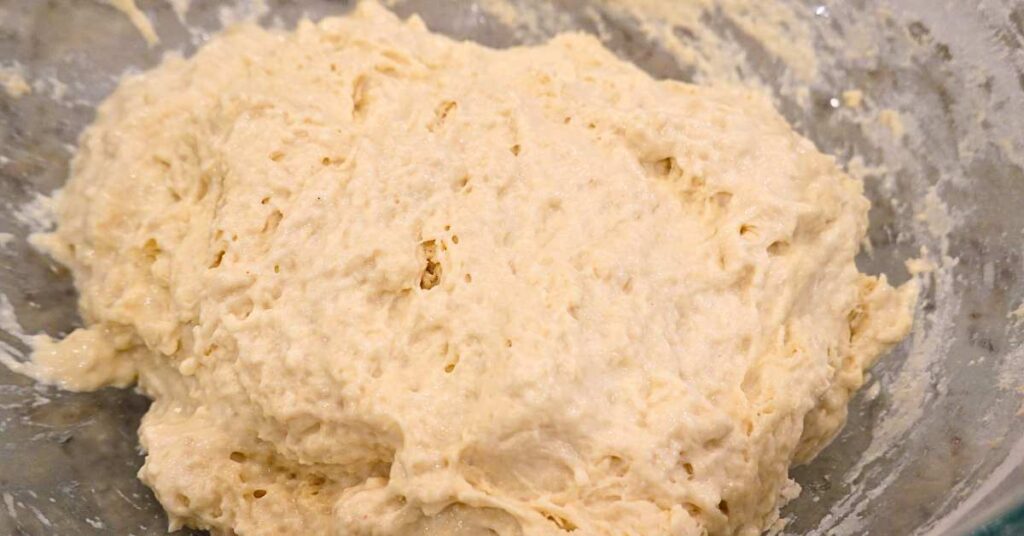
- Add 4 cups of flour to the bowl and mix starting in the center until all the dry flour is incorporated. This dough will be what is called a shaggy dough. Don’t worry it will be smooth later in the process.
- Cover the bowl with a damp tea towel because you don’t want your dough to dry out. Then wait 30-60 minutes.
- Now it is time to do stretch and folds to develop gluten strength. Here is how to do stretch and folds: If you wet your hands with water before you touch the dough it won’t stick to them. This works for measurement utensils also. I keep a small bowl of water beside my dough. Pull the dough up on the edge and stretch is up then let it fall over itself. Turn the bowl a quarter turn then stretch and fold on this side. Turn the bowl two more quarter turns doing a stretch and fold at each turn. This completes a round of stretch and folds. Think of the bowl having a north, east, south, and west. Do several rounds of stretch and folds until your dough is smooth. Cover dough with a damp tea towel.
- Let the dough ferment covered on the counter at room temperature until you see the dough has risen by 1/3 to 1/2, and is bubbly. Then take a pinch of dough and drop it in a cup of water. If it floats then it is ready to shape. If it sinks then let it bulk ferment longer but be careful not to over-ferment the dough.
- It is hard to give you an exact time due to so many variables such as ambient temperature, type of flour, and maturity of starter. My whole process from start to finish is usually about 4-6 hours in the summer and 6-8+ hours in the winter.
- Here is the process to shape dough: 1. Pre-Shape: Gently let dough slowly fall out of the bowl onto a lightly floured counter. Fold it over itself a few times and shape into a ball. Your hand and a dough scraper are very helpful. Cover, let rest for 20 minutes. 2. Final Shape: Stretch the dough into a rectangle then fold in each side like a burrito. Then starting on the end closest to you start rolling up the dough, pinch ends closed. Using your hands push the dough ball away from you and pull it back, this builds tension. You want a smooth, taut surface on the dough ball.
- Place the shaped dough on a parchment paper lined cookie sheet with the smooth side up . Cover with a damp tea towel and Let proof 1-2 hours or until puffy and the dough springs back slowly when you touch it.
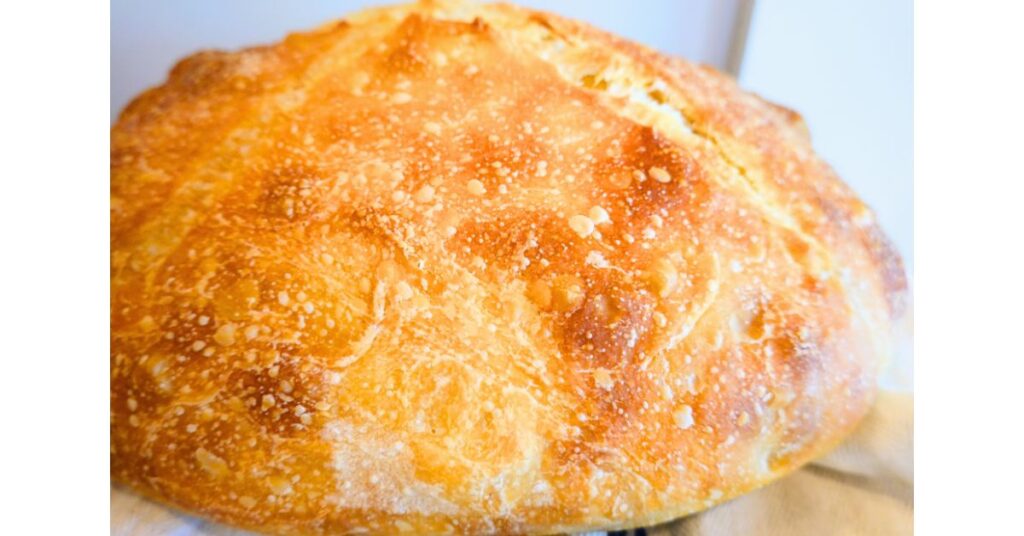
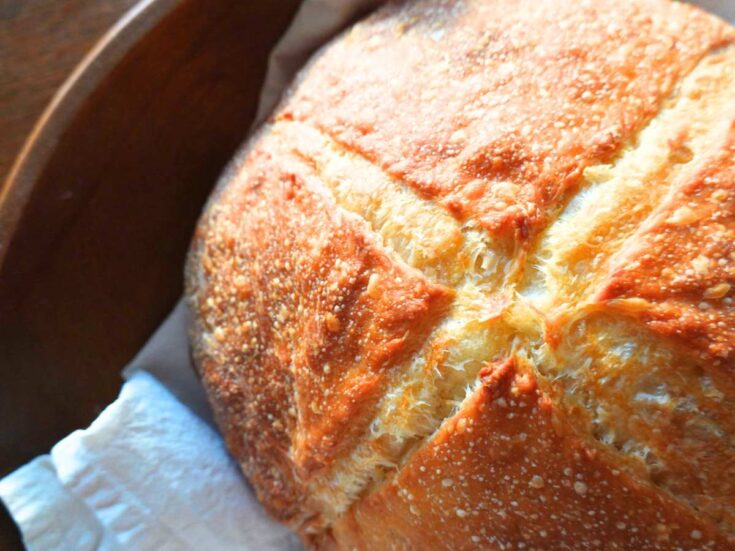
- Preheat oven at 400F. for 20 minutes. Score the bread then brush with olive oil. Refer to photos to see how I score the sandwich bread. I just do a cross score on this style of sourdough. The lines will come in handy later when I am cutting the sandwich. The dough is easier to score if it is cold.
- Bake 30-45 minutes at 400 degrees or until golden brown. Ovens will vary!
- Cool before slicing.

Sourdough Bread Dough just mixed into a shaggy dough
You will be successful with this recipe. As with anything practice makes perfect.
Sourdough Love,
Caren
Helpful Ideas
The whole point is to have a bread recipe that fits into your schedule and is not complicated.
- If you wet your hands and utensils this helps prevent sourdough from sticking.
- I never make bread during my work hours. I milk cows in the morning, garden, and am not usually in the house to babysit bread. My bread making hours are first thing in the morning, at dinner time or most often, right before I go to bed. I have been making sourdough for a very long time and get good results and so can you.
- Feed your sourdough starter early in the morning so it will be ready to make dough by dinner time. My favorite schedule is to mix my dough about 5pm-6pm while I am in the kitchen anyway. Then before I go to bed I put the dough in the refrigerator for the night.
- At breakfast I shape the dough and let it proof until ready to bake.
- Remember I live in Texas and temperatures can be over 100F degrees. If I leave the dough at room temperature it will be ready to go in the refrigerator in 3.5 – 4.5 hours. Remember the dough float test is a good test to see if your dough is ready to move on to the next step.
Schedule Examples
- Sometimes I mix this dough at 5pm. when I am cooking supper, just make it work for your schedule.
- I do maybe 1 or 2 stretch and folds. By 9pm. I do a float test on the dough, if it floats then it goes into the refrigerator for the night. Don’t forget to cover it.
- The next day I shape and bake in the morning if I want to make a sandwich for lunch. Or I might wait until late afternoon to shape then bake so we will have fresh hot bread for dinner. They both work.
- Ambient temperature plays a major role in speed of fermentation. Times will vary greatly in each season.
- This recipe is very flexible so make it fit into your schedule.
Children's Favorite Sandwich Bread

Ingredients
- 4 cups Flour-Unbleached All-Purpose - organic is best
- 1 3/4 teaspoons Salt-I use Redmond or sea salt
- 1 tablespoon Sugar or Honey
- 1 1/2 cups Filtered water-no chlorine
- 1/2 cup active Sourdough Starter
- Olive oil
Instructions
- Feed your sourdough starter 4-12 hours before you are ready to make your dough. You will need 1/2 cup of active starter for your recipe. To feed your starter: discard all but 1 or 4 tablespoons of starter in your jar, then add 1/4 cup of water and a scant 1/2 cup of flour. Mix, cover, and set aside until doubled with bubbles on the side of the jar and a bubbly dome on top. Do a float test by putting a teaspoon of starter in a cup of water. If it floats then it is active enough to make bread. The warmer the ambient temperature the faster the rate of fermentation-the colder the ambient temperature the longer it will take for your starter to be active.
- In a bowl add 1 1/2 cups of water, then 1/2 cup of sourdough starter. The starter should float in the water, this is a good test to make sure your starter is active.
- Add 1 3/4 teaspoons salt, and 1 tablespoon honey/sugar to the bowl. Mix well until the mixture looks milky.
- Add 4 cups of flour to the bowl and mix starting in the center until all the dry flour is incorporated. This dough will be what is called a shaggy dough. Don't worry it will be smooth later in the process.
- Cover the bowl with a damp tea towel because you don't want your dough to dry out. Then wait 30-60 minutes.
- Now it is time to do stretch and folds to develop gluten strength. Here is how to do stretch and folds: If you wet your hands with water before you touch the dough it won't stick to them. I keep a small bowl of water beside my dough. Pull the dough up on the edge and stretch is up then let it fall over itself. Turn the bowl a quarter turn then stretch and fold on this side. Turn the bowl two more quarter turns and this will complete a round of stretch and folds. Think of the bowl having a north, east, south, and west. Do several rounds of stretch and folds until your dough is smooth. Cover dough with damp tea towel.
- Let the dough ferment covered on the counter at room temperature until you see the dough has risen by 1/3 to 1/2, and is bubbly. Then take a pinch of dough and drop it in a cup of water. If it floats then it is ready to shape. If it sinks then let it bulk ferment longer but be careful not to over-ferment the dough.
- It is hard to give you an exact time due to so many variables such as ambient temperature, type of flour, and maturity of starter. My whole process from start to finish is usually about 4-6 hours in the summer and 6-8+ hours in the winter.
- Here is the process to shape dough: 1. Pre-Shape: Gently let dough slowly fall out of the bowl onto a lightly floured counter. Fold it over itself a few times and shape into a ball. Your hand and a dough scraper are very helpful. Cover. Let dough rest for 20 minutes. 2. Final Shape: Stretch the dough into a rectangle then fold in each side like a burrito. Then starting on the end closest to you start rolling up the dough, pinch ends closed. Using your hands push the dough ball away from you and pull it back, this builds tension. Do this until you have a smooth, taut surface but you do not want the outer layer to tear.
- Place the shaped dough smooth side up on a parchment paper lined cookie sheet. Cover with a damp tea towel and Let proof 1-2 hours or until puffy and the dough very slowly springs back when you touch it.
- Preheat oven at 400F. for 20 minutes. Score the bread then brush with olive oil. Refer to photos to see how I score the sandwich bread. I just do a cross score on this style of sourdough. The lines will come in handy later when I am cutting the sandwich. The dough is easier to score if it is cold.
- Bake 30-45 minutes at 400 degrees or until golden brown. Ovens will vary!
- Cool before slicing.
Notes
Helpful Ideas
The whole point is to have a bread recipe that fits into your schedule and is not complicated.
- Always wet your hands and utensils so the dough won't stick to them.
- I never make bread during my work hours. I milk cows in the morning, garden, and am not usually in the house to babysit bread. My bread making hours are first thing in the morning, at dinner time or most often right before I go to bed. I have been making sourdough for a very long time and get good results and so can you.
- Feed your sourdough starter at lunch time so it will be ready to make dough by dinner time. My favorite schedule is to mix my dough about 5pm-6pm while I am in the kitchen anyway. Then before I go to bed I put the dough in the refrigerator for the night.
- At breakfast I shape the dough and let it proof until ready to bake.
- Remember I live in Texas and temperatures can be over 100F degrees. If I leave the dough at room temperature it will be ready to go in the refrigerator in 3.5 - 4.5 hours. Remember the dough float test is a good test to see if your dough is ready to move on to the next step.
Schedule Examples
- Sometimes I mix this dough at 5pm. when I am cooking supper, just make it work for your schedule.
- I do maybe 1 or 2 stretch and folds. By 9pm. I do a float test on the dough, if it floats then it goes into the refrigerator for the night. Don't forget to cover it.
- The next day I shape and bake in the morning if I want to make a sandwich for lunch. Or I might wait until late afternoon to bake so we will have fresh hot bread for dinner. They both work.
- Ambient temperature plays a major role in speed of fermentation.
- This recipe is very flexible so make it fit into your schedule.
My Children’s Favorite Sandwich

My Children’s Favorite Sandwich served with Pesto Tortellini
Need a recipe for a clean lunch meat to serve on your sandwich?
Here is the perfect recipe for Beef Summer Sausage without nitrates. A clean lunch meat that everyone loves!

Healthy Beef Summer Sausage without nitrates ready to use to make sandwiches
Want to see how to make this memorable sandwich?


